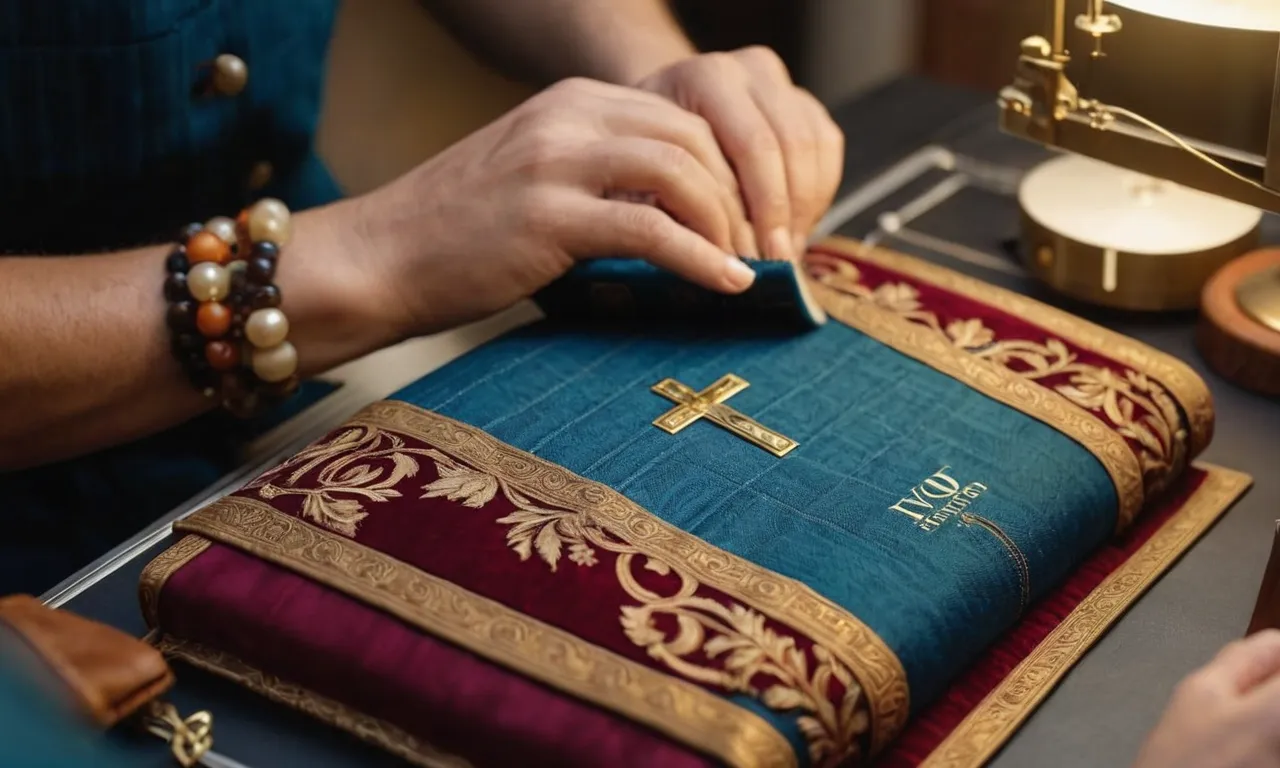
How To Make A Bible Cover: A Step-By-Step Guide
Making a custom bible cover can be a meaningful DIY project. Protecting your treasured bible with a handmade cover adds a personal touch. This comprehensive guide will walk you through all the steps for crafting a beautiful bible cover.
If you’re short on time, here’s a quick answer to your question: Choose your bible cover materials such as fabric, vinyl, leather or faux leather. Measure your bible’s dimensions. Cut fabric pieces for the cover front, back, spine, and flap. Bind the edges of the cover.
Attach closure straps or buttons. Add any decorative elements.
Pick Your Bible Cover Materials
Fabric
Fabric is a popular choice for Bible covers due to its softness, flexibility, and variety of patterns and textures. Cotton, linen, and poly-cotton blends are common fabric choices that make durable yet comfortable covers. Quilted fabric with padding offers extra protection.
With hundreds of solid colors and printed patterns to choose from, you can find a fabric cover to suit any style. Fabrics like twill, corduroy and canvas provide a more structured cover that maintains the Bible’s shape when carried. Lightweight cottons and linens are ideal for warmer climates.
Fabrics can be dressed up with lace, embroidery, buttons and other embellishments. The main downside is that fabric covers don’t offer as much protection from the elements as vinyl or leather.
Vinyl
Vinyl is a versatile, affordable Bible cover option. It is water-resistant and easy to wipe clean, making it very practical for everyday use. Vinyl covers often feature decorative stitching and come in glossy or matte finishes. They can mimic leather at a fraction of the cost.
Some vinyls have a soft, flexible feel, while others are more rigid and offer excellent support. Clear vinyl covers allow you to see the actual Bible cover underneath. An advantage of vinyl covers is the wide range of patterns and colors available, including floral prints, solids, and scripture verses.
The main drawback is that vinyl covers lack the high-end look and feel of real leather. Over time, vinyl can crack or become brittle if not properly cared for.
Leather/Faux Leather
For a luxurious cover, leather is a premier choice that gets better with age. Full-grain leather is extremely durable and develops a rich patina over time. There are also faux leathers made of PU and PVC that closely resemble real leather at a lower price point.
Leather covers offer sophisticated styling and top-notch protection for your Bible. They tend to be thinner and more flexible than vinyl, making them comfortable to hold during extended reading sessions.
Leather covers come in a variety of colors from classic black to vibrant turquoise and are either smooth or embossed with decorative patterns. With proper care and maintenance, a quality leather or faux leather cover can last decades and become a treasured heirloom.
The main downside is the higher cost, but for many the luxury factor is worth the investment.
Measure Your Bible’s Dimensions
The first step in making a custom Bible cover is to carefully measure the dimensions of your Bible. Having precise measurements will ensure your cover fits perfectly.
Length and Width
Use a ruler or measuring tape to determine the length and width of your Bible. Measure across the front and back covers from edge to edge. For the most accurate sizing, open your Bible flat and measure the pages across as well. Round your measurements to the nearest 1/4 inch.
Spine Width
The spine is the thickness of your Bible from front to back. This is an important measurement for getting a good fit. Stand your Bible upright with the pages fanned out. Use a ruler to measure across the edge of the pages at the spine. Round to the nearest 1/8 inch.
Account for Extra Room
When sewing your cover, make sure to add a little extra width and length beyond the measurements of your Bible. Having at least 1/4 inch of room along each edge will make it easier to slide your Bible in and out of the cover.
Recording accurate measurements is crucial for a custom look. So grab your tape measure and ruler and carefully size up your holy book. With the right dimensions in hand, you’ll be well on your way to creating a perfect one-of-a-kind Bible case.
Cut Fabric Pieces for the Cover
Front Panel
The front panel is the largest piece and will be the decorative focal point of your Bible cover. When cutting the fabric, make sure to leave a 1/2 inch seam allowance on all sides so you have room to sew the pieces together.
The recommended finished dimensions for the front panel are 10 inches tall by 7 inches wide. This will fit a standard compact or thinline Bible. If making a cover for a larger Bible, adjust dimensions accordingly.
Back Panel
Cut the back panel to the same dimensions as the front panel piece. It can be made of a coordinating print or a solid piece that matches or complements the front panel fabric. Just like the front, cut it 10 inches by 7 inches with 1/2 inch seam allowances on all sides.
Spine
The spine length will vary depending on the width of your Bible. Wrap a soft tape measure around the width of your Bible to determine the needed spine length. Add 1/2 inches to this measurement for seam allowances. The height should be the same 10 inches as the front and back panels.
For example, if your Bible measures 1 1/2 inches thick, you would cut the spine piece 2 1/2 inches wide by 10 inches tall.
Flap
The flap secures the cover closed. Determine the desired finished length and height for your flap style. Common dimensions are around 4 inches wide by 6 inches tall. Add 1/2 inch seam allowances to the finished size when cutting out the fabric.
Bind the Edges of the Cover
Binding the edges of a Bible cover is an important step to give it a clean, finished look. Here are some tips for getting it done right:
1. Prepare your binding materials
You’ll need binding tape or ribbon, fabric glue, scissors, and a bone folder or dull butter knife. Choosing materials that match or complement your Bible cover fabric is best for a cohesive look. Opt for binding tape in a neutral color like black or brown if you’re unsure.
2. Cut binding strips
Cut your binding material into strips that are 1-2 inches wider than the thickness of your cover. This gives you room to fold the edges over. It’s better to cut strips longer than needed so they can be trimmed later.
3. Fold and press strips
Fold the strips in half lengthwise, with the right sides facing out, and press a crease. Then open up the strips and apply fabric glue along one long edge.
4. Attach binding to cover
Starting at any cover corner, align the raw edges of the open binding strip along the edge, glued side down. Use a bone folder to press the strip in place for good adhesion. Wrap the strip around to the inside of the cover so it just covers the edge.
5. Miter the corners
When you get to each corner, fold the binding at a 45 degree angle to neatly miter it rather than just continuing around the 90 degree angle. This avoids extra bulk and gives the binding a smooth look.
6. Trim excess and finish
Continue attaching binding strips all around the cover edges, trimming excess length as needed once they are secured. Then fold the inner flaps over to hide the edges and glue down. Press once more with bone folder for a crisp finish! Your bound Bible cover edges are now complete.
Attach Closure Straps or Buttons
Once your Bible cover is fully assembled, it’s time to add the closure straps or buttons to keep it securely closed. Here are some tips for this final step:
Sew On Straps
If you want to attach fabric straps, cut two strips of coordinating fabric about 1-2 inches wide x 10-12 inches long. Fold each strip in half lengthwise and press. Open up the folded strip and fold each long edge to the center crease. Press again.
Next, fold the entire strip in half once more so you have a long, narrow folded strap. Topstitch down both long edges for a clean look.
Pin one strap to the center front edge of the back cover, aligning the raw ends. Do the same for the other strap on the front cover. Make sure to leave enough length so the straps can overlap comfortably when closed. Sew the straps in place along the pinned edges using a straight or zigzag stitch.
Add Buttons
For a button closure, sew two buttons onto the front cover, one at the top and one at the bottom. They should be placed about 1-2 inches in from the side edge. On the back cover, mark spots to sew the buttonholes, making sure they align with the buttons on the front.
Using a buttonhole stitch on your sewing machine, sew buttonholes at the marked spots. Make sure the buttonholes are large enough for the buttons to pass through smoothly. Alternatively, you can hand sew the buttonholes using a blanket stitch.
Once the buttons and buttonholes are sewn, you can close your Bible cover by looping the buttons through the holes. This creates a secure closure without any visible snaps, Velcro, or ribbons.
Other Closure Ideas
Here are some other ways to finish your Bible cover closure:
- Sew on snap closures or Velcro strips instead of buttons.
- Attach ribbons by sewing one end onto the inside of the front cover and the other end on the back cover. Tie together to close.
- Sew a magnet onto the inside of the front cover and a piece of metal (washer, etc) onto the back cover.
- Tie on cotton twill tape using a slip knot so it can be adjusted.
Get creative with the closures! Find something that matches the style of your Bible cover and is easy for you to open and close. The finishing touches really complete your handmade project.
Add Decorative Touches (Optional)
Applique
Adding applique touches can take your Bible cover to the next level. Applique refers to sewing or gluing fabric pieces or other embellishments onto your cover. Some popular applique ideas include:
- Sewing on lace, ribbons, buttons, or fabric flowers
- Gluing on sequins, beads, or jewels to spell out words or phrases
- Cutting fabric into shapes like crosses, hearts, or flowers and stitching them on
- Adding monogrammed fabric letters
When sewing on appliques, be sure to use a tight zigzag stitch and quality thread so the appliques stay securely attached. Use fabric glue rated for heavy usage if opting to glue on embellishments.
Embroidery
Embroidery is another excellent way to decorate your Bible cover with personal flair. You can embroider designs, words, names, or Bible verses directly onto the cover using embroidery floss and embroidery needles. Some ideas include:
- Stitching a meaningful Bible verse onto the front or back cover
- Adding the name of the Bible’s owner or recipient
- Embroidering Christian symbols like a cross, dove, or open Bible
- Creating a border along the edges using a chain stitch or backstitch
When embroidering, be sure to use sharp embroidery needles and good quality floss. Tightly pull the floss to avoid loose or messy stitching. If new to embroidery, start with simple designs and work your way up to more advanced techniques.
Painting/Stenciling
Painting or stenciling the cover is a fun way to add color, patterns, and artistic flair. Some ideas include:
- Using acrylic paints to paint designs, like flowers or swirling patterns
- Painting meaningful words or Bible verses on the cover
- Stenciling on designs using stencils and fabric paint
- Creating ombre effects by blending painted colors
Be sure to use acrylic paints designed for fabric and heat set the paint after finishing. When stenciling, secure the stencil in place with painter’s tape and use a foam pouncer to apply fabric paint evenly. Start light, adding more paint as needed.
Allow the paint to fully dry before removing the stencil.
With some creativity, you can truly make your Bible cover unique by adding appliques, embroidery, painting, or other decorative touches. It allows you to customize it to suit your personality and style.
Conclusion
With the right materials, measurements, and technique, you can create a custom bible cover that protects your holy book in style. Follow this guide to craft a cover that expresses your faith and creativity. Enjoy having a cherished book wrapped in your own handiwork.
Your personalized bible cover will become an heirloom to treasure for years.